Home | Audio | DIY | Guitar | iPods | Music | Brain/Problem Solving | Links| Site Map
This work is licensed under a Creative Commons License.
Picture Gallery
The objective of the tutorial is to create a picture gallery without making the page graphics heavy and thus slow to download. The finished gallery weighs just 23 K and downloads in 7 secs on a 28.8 KBPS connection including the thumbnailimages and scripts. This is possible due to some excellent extensions made available free by Project Seven. The extensions used are:
- Scroller, Horizontal
- ShowPic
- Return False Fix
All of the above extensions are available for download at the Project Seven Extension Page
The project files can be downloaded here. The files contain the thumbnails and the pictures used. You could use your own images to complete the tutorial.
Thumbnail Scroller
The first task is to build the scroller to scroll the thumbnails. Lets get into it right away!
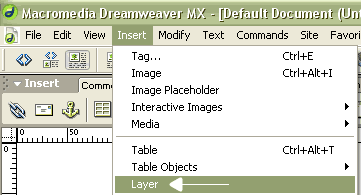
Insert --> Layer inserts a layer into the current dreamweaver document

Select the inserted layer by click <div#Layer1> in the status bar of Dreamweaver. Change the properties of the layer as shown
- Name --> container
- L --> 100px
- T --> 100px
- W --> 300px
- H --> 100px
- Overflow --> hidden
- Clip L --> 0
- Clip T -->0
- Clip R --> 300
- Clip B -->100

Place your cursor inside the "container" layer and insert another layer

Again select the inserted layer by click <div#Layer1> in the status bar of Dreamweaver. Change the properties of the layer as shown
- Name --> content
- L --> 0px
- T --> 0px
- W --> 600px
- H --> 100px
How did we arrive at the Layer properties defined above? If you look at the images you downloaded, you will notice that each thumb nail is a 100 px x 100 px. We have six thumbnails. The "container" layer was planned such that 3 thumnails are see in the view port and the others will scroll horizontally. Hence the width was calculated as 100px (width of each thumbnail) x 3 = 300px. The height of the thumbnails (100px) becomes the height of the "container" layer. The L(left) and T(top) positions are determined by where you want the scroller to appear in your document. The clip L=0, T=0, R=300 and B=100 determine the viewport of 300 px x 100 px. The "content" layer is nested inside the "container" layer. Its position is with respect to the "container" layer nad hence the L and T are set to 0, 6 thumbnails of 100 px width each make the width 600px and the height is 100 px (height of each thumbnail).
Insert the 6 Thumbnail Images inside the "content" layer.

Insert another layer and set its properties as above
- Name --> control
- L -> 100px
- T --> 225px
- W --> 300px
- H --> blank
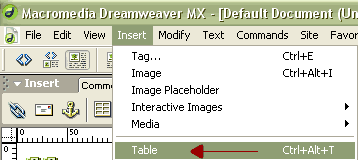
Insert a table with 1 row and 3 columns with a width of 300px. Type "left", "reset" and "right" in each cell resp.

Your document should look like the picture above
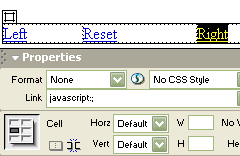
Select each and type "javascript:;" (w/o quotes) in the Link Text Box of Properties Inspector as shown above. This creates null link.
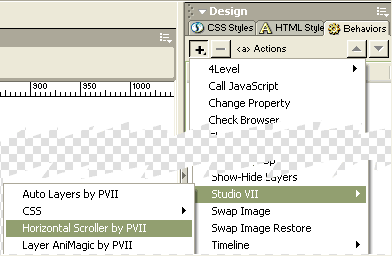
With "Left" null link selected, click + on the behavior panel and select Horizontal Scroller from the Studio VII flyout menu
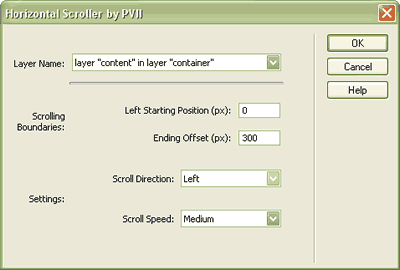
The Behavior Interface window as above pops up. Select Layer content, Set the scrolling boundries, Left starting position 0 and Ending offset 300px. Scroll Direction Left, Scroll Speed Medium. Click Ok.
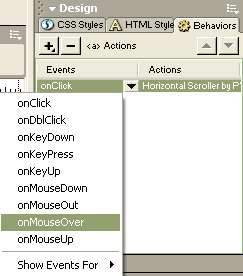
Change the event to onMouseOver. Invoke the Behavior Interface again with "Left" selected.
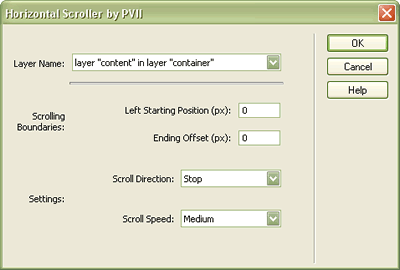
Select the content layer for Layer Name and Scroll DIrection as "Stop". Click ok. Change the event to onMouseOut.
Repeat the same for "Right" Null Link, only difference being Scroll Direction Right for onMouseOver Event.

Select the "Reset" Null Link and apply the Behavior with Scroll Direction as reset
This completes the thumbnail scroller! Preview it in your browser(F12)
Show Picture
The Show Picture Extension allows you to insert a target layer for each full sized image. However the images are not loaded when the document loads. Rather the thumbnail links trigger each image to load on demand. Hence the page size remains low!. Lets insert the Show Pic layers.
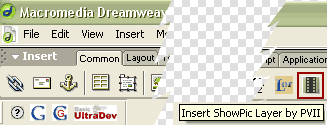
Click the Insert ShowPic Layer by PVII Icon as Show above in the Common Tab of the Insert bar
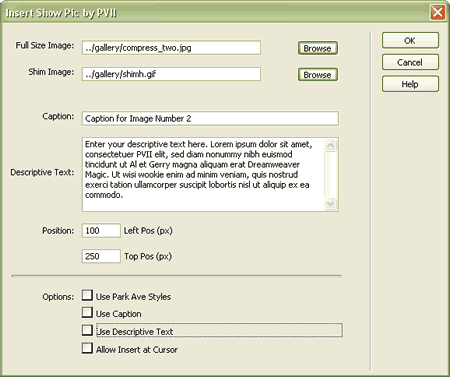
Browse to the full size image. The download contains 2 shim images shimv and shimh. Depending on whether the full size image is landscape or potrait select the corresponding shim.Add a Caption and Description for the image if you like. Position the Left and Top of the Image as required and click Ok. A layer called P7ShowPL1 gets inserted.
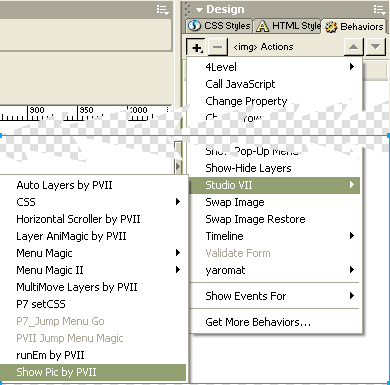
Select the Thumnail corresponding to the image layer just inserted. Click + on the Behavior Panel, Select Show Pic by PVII as shown above.
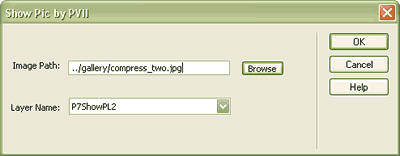
Select the image again, Choose the layer name just inserted. Click Ok. Apply the Return False Fix Command. Commands --> Studio VII --> Apply Return False Fix by PVII. On the interface just click Ok.
This completes the gallery. Preview the document in your browser.
Home | Audio | DIY | Guitar | iPods | Music | Links | Site Map | Contact